Raspberry Pi Project: How to convert a USB All-in-One Printer to a Wireless Printer

I have an All-in-One Printer that is linked via USB to my main PC. What if I want to print a document from my phone, or from other devices in my network? I can share the printer or setup a Google Cloud Print, but it requires my main PC to be constantly turned on. Is there a simpler way to do this? Raspberry Pi would be a great option to set up printer server.
Our objective is to be able to efficiently create a printer server that can be utilize by the devices in my network. We will use a Raspberry Pi 2 as our printer server and install Common Unix Print System (CUPS). CUPS is the standards-based, open-source printing system created by Apple Inc. for macOS and other UNIX-like operating systems. CUPS uses the Internet Printing Protocol (IPP) to support printing to local and network printers.
Prerequisites:
- A Raspberry Pi with Raspberry Pi OS. For this guide, I am using a Raspberry Pi 2 with a Raspberry Pi OS and SSH enabled.
- A USB printer. For this guide, I am using my Epson L3110 All-in-One printer.
- [Optional] A compatible Wi-Fi adapter for Raspberry Pi if you do not have access to a wired connection.
Steps for the printer server
- Remotely connect to the Raspberry Pi via SSH. (For this guide I use Putty.)
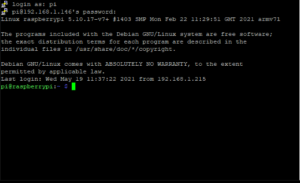
Figure 1. Putty - To ensure the OS has the latest updates, use the command below.
sudo apt-get updatesudo apt-get upgrade
Figure 2. Update Raspberry Pi OS 
Figure 3. Upgrade Raspberry Pi OS - After the updates are installed, reboot Raspberry Pi using the command below.
sudo reboot - We need to set a static IP of Raspberry Pi. This is to make sure that constant IP is assigned to our printer server. There are two ways to do this:
- Setting up the static IP in your router
- Editing the DHCP config file in your Raspberry Pi.
For this guide, we will edit the DHCP config file. Use the command below to do this.
sudo nano /etc/dhcpcd.conf - Since I am using Wi-Fi for this guide, we will focus on the wlan0. Add the
ffcommands, use the eth0 interface for wired, and wlan0 for Wi-Fi.
interface eth0static ip_address=192.168.1.10/24static routers=192.168.1.1static domain_name_servers=192.168.1.1interface wlan0static ip_address=192.168.1.146/24static routers=192.168.1.1static domain_name_servers=192.168.1.1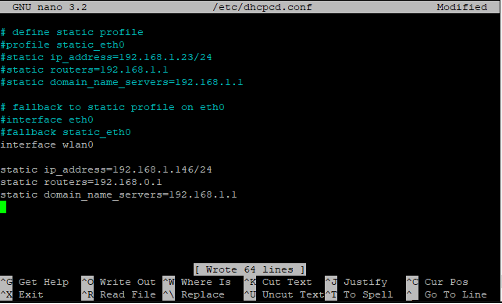
Figure 4. DHCP Config File - Press Ctrl + X then press Y and Enter to save the config file.
- Reboot Raspberry Pi using the command below.
sudo reboot - Next is to install CUPS. Use the command below. (Note, since I already have CUPS installed, the screenshot result is different.)
sudo apt-get install cups
Figure 5. Install CUPS - We need to make changes to the CUPS config file to log on to the web GUI, which allows access to the admin settings. Use the command below to edit the file.
sudo nano /etc/cups/cupsd.conf# Restrict access to the server…
<Location />
Order allow,deny
Allow @Local
</Location>
# Restrict access to the admin pages…
<Location /admin>
Order allow,deny
Allow @Local
</Location>
# Restrict access to configuration files…
<Location /admin/conf>
AuthType Default
Require user @SYSTEM
Order allow,deny
Allow @Local
</Location>Figure 6. CUPS Config File
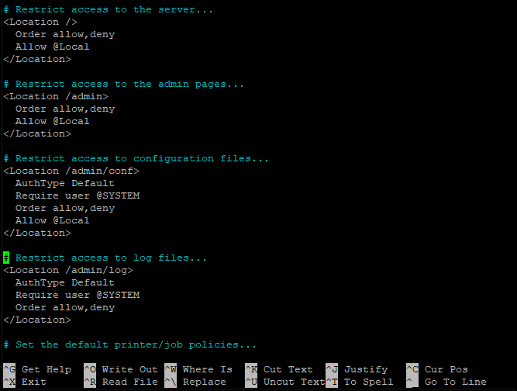
Figure 7. Edit CUPS Config File - Press Ctrl + X then press Y and Enter to save the config file.
- After making changes to the CUPS config file, we need to make sure the “Pi” user can access the administrative functions of CUPS. Use the command below.
sudo usermod -a -G lpadmin pi - Use the command below to ensure that CUPS can be accessed by all the devices in the network.
sudo cupsctl --remote-any - Restart CUPS to apply the changes.
sudo /etc/init.d/cups restart
Figure 8. Restart CUPS - To send print commands from Windows devices, we need to setup SAMBA.
sudo apt-get install samba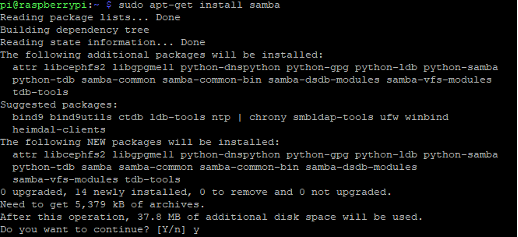
Figure 9. Install SAMBA - Next is to edit SAMBA configuration, use the command below to edit the file.
sudo nano /etc/samba/smb.conf- Edit the Printers Section
[printers]
comment = All Printers
browseable = no
path = /var/spool/samba
printable = yes
guest ok = yes
read only = yes
create mask = 0700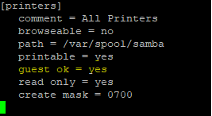
Figure 10. SAMBA Config File: Printers Section - Edit the Print Section
[print$]
comment = Printer Drivers
path = /var/lib/samba/printers
browseable = yes
read only = no
guest ok = no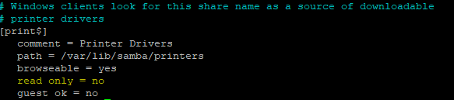
Figure 11. SAMBA Config File: Print Section
- Edit the Printers Section
- Press Ctrl + X then press Y and Enter to save the config file.
- Restart SAMBA service to apply changes, use the command below.
sudo /etc/init.d/smbd restart
Figure 12. Restart SAMBA Service - It’s time to add our printer in CUPS. We can do this by accessing the web GUI. You can use any device connected to your network to access CUPS interface. Input the IP address on the web browser and the default port of CUPS, which is “631.” (For this guide, the address is “192.168.1.146:631”)
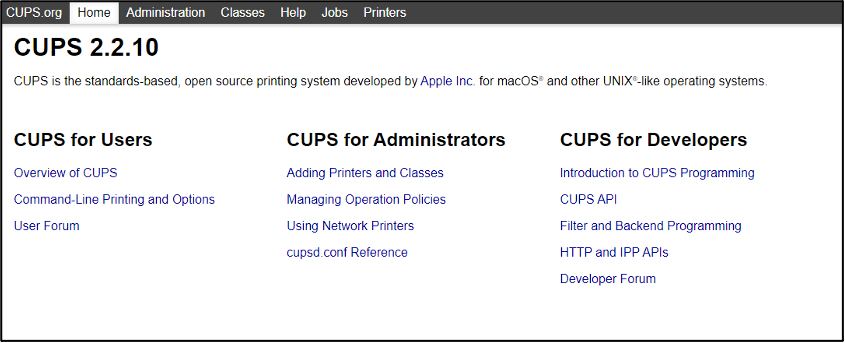
Figure 13. CUPS Interface - Turn on your printer and connect it to Raspberry Pi via USB. In the CUPS web interface, go to “Administration” and click “Add Printer”.
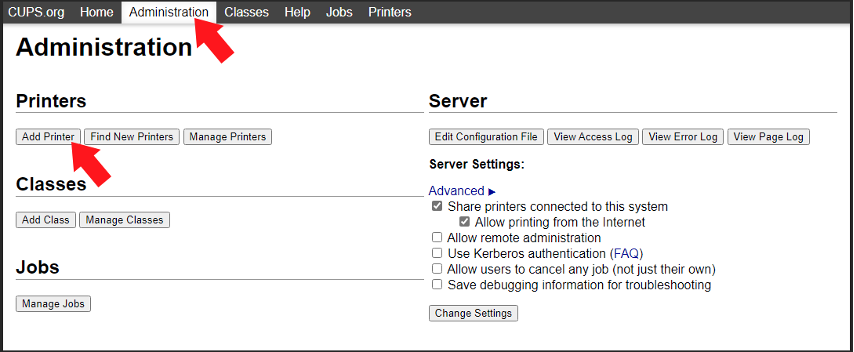
Figure 14. CUPS Adding Printers - If you are redirected to an “Upgrade Required” page. Simply click the CUPS IP address link. For this guide, the link is “https://192.168.1.146:631/admin/”. You will need to input the user “Pi” password to access the admin page.
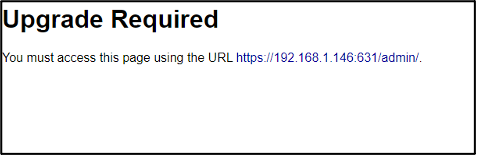
Figure 15. CUPS Administrator Required - I am using my Epson L3110 All-In-One Printer for this guide. The printer that is connected to Raspberry Pi should be under the Local Printer. Select your printer and click “Continue.”
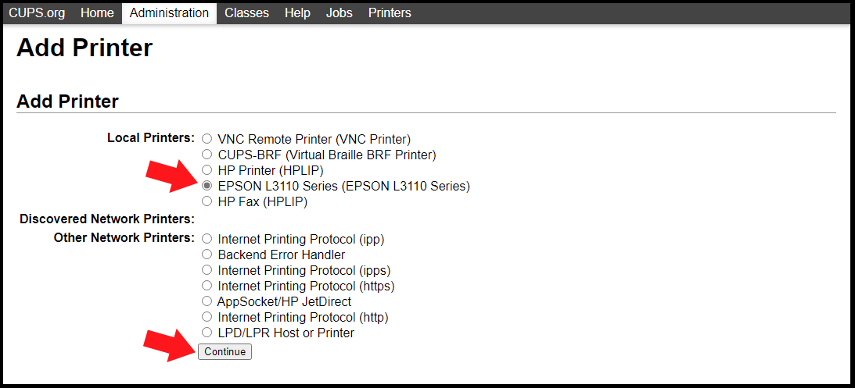
Figure 16. Adding a Printer - This setting is very important! Toggle “Share This Printer” checkbox and click “Continue.”
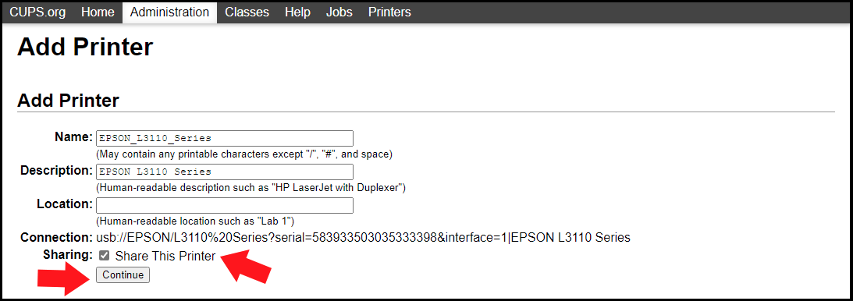
Figure 17. Share This Printer - Select the correct model of your printer. For this guide, I select “EPSON L3100 Series” and click “Add Printer.”
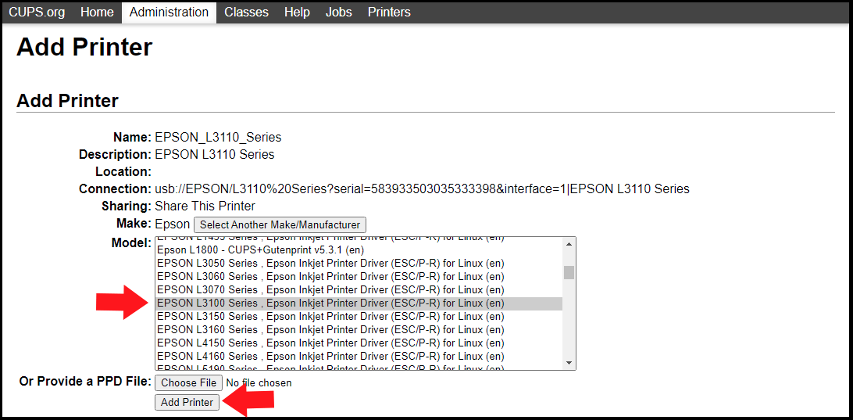
Figure 18. Select Printer Model - Set you preferred printer settings and click “Set Default Options.”
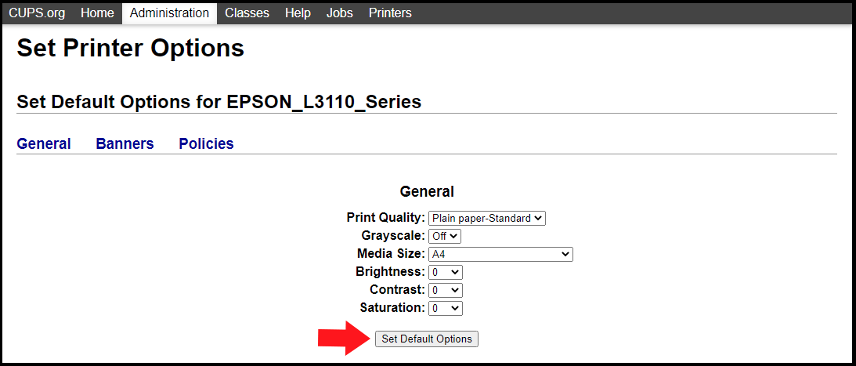
Figure 19. Printer Default Settings - Next, install the printer on your Windows device. At your Windows PC, go to “Printers & scanners” and click “Add a printer or scanner.”
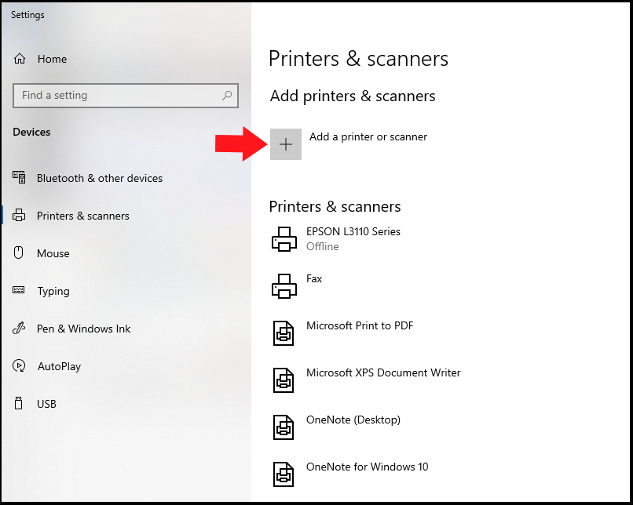
Figure 20. Printer & scanners - Wait for Windows to finish searching for any printers connected to the network. Select the printer that’s connected to your Raspberry Pi. For this guide, I select “EPSON L3110 Series @ raspberrypi” and click “Add device.”
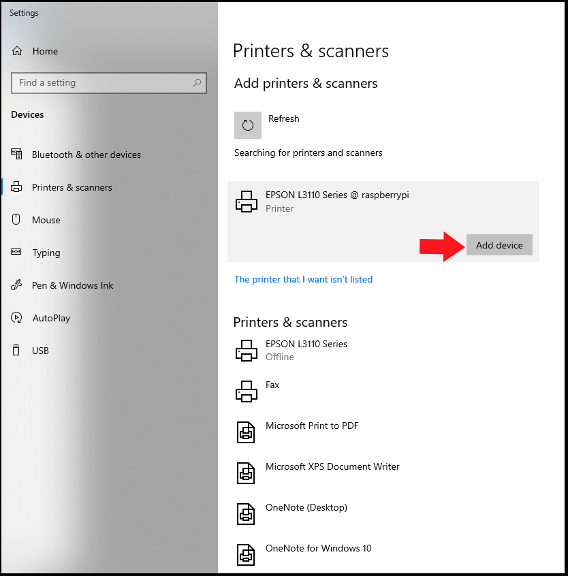
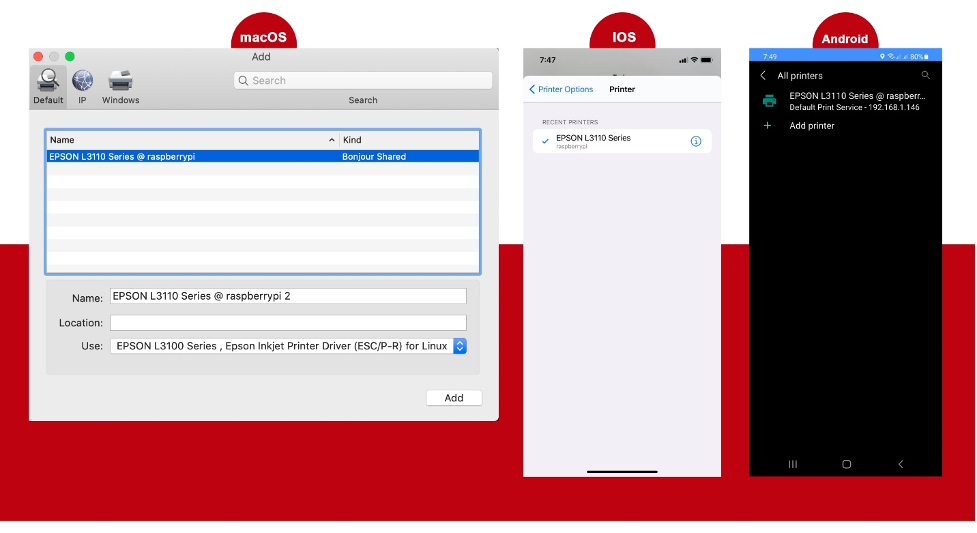
Figure 21. Adding the Network Printer - The printer is now added to your “Printers & scanners” list and can be used to print your documents, images, etc.
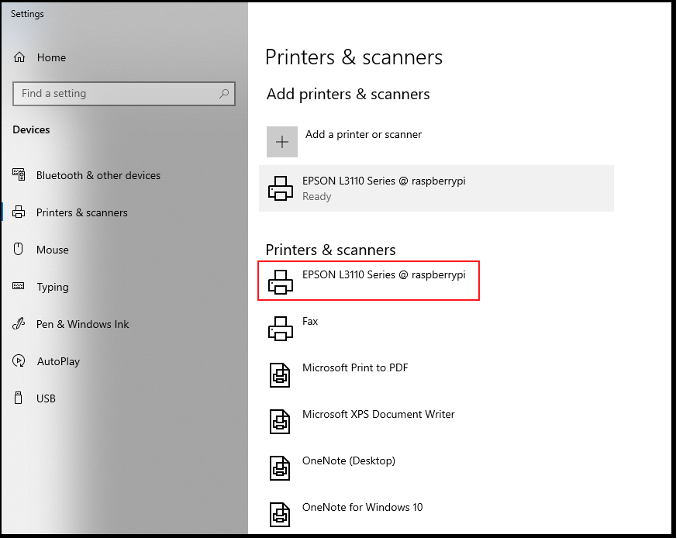
Figure 22. Network Printer Added
Conclusion
My USB printer is now accessible to all devices in my network. I can now take advantage of printing my documents using my mobile phones. In addition to that, my printer is now accessible by any Windows and macOS devices that are linked to my network.