How to Disable Windows Defender

On Windows 10, Microsoft Defender Antivirus is the default cybersecurity protection from viruses, spyware, malware, and ransomware. However, many users find that for personal needs they prefer to use another type of cybersecurity protection. The problem is trying to disable Windows Defender, which can be a little tricky — it is in fact simply not possible to uninstall Defender, because it’s built into the Windows system.
That said, in this article we’ll run through two solutions: temporarily disable Windows Defender, and permanently disable Windows Defender.
How to Temporarily Disable Windows Defender
1. Go to Start.
2. Open Windows Security and click the top result.
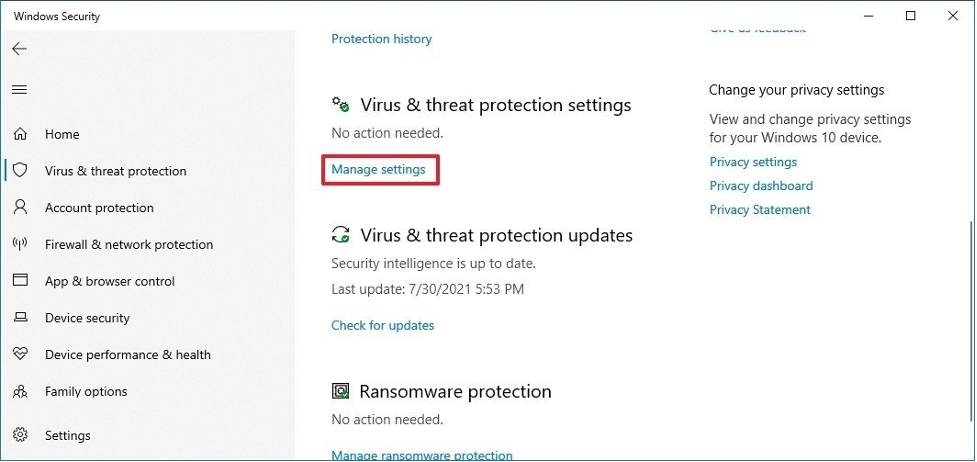
3. Go to Virus & threat protection.
4. Under Virus & threat protection settings, click Manage settings.
5. Turn off the Real-time protection switch to disable Windows Defender temporarily.
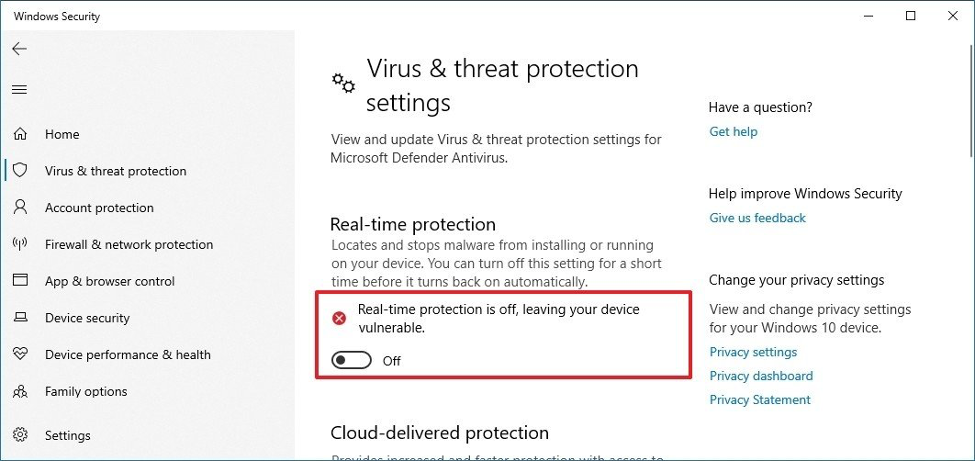
Following these steps will temporarily disable Windows Defender in Windows 10, giving you the time to install alternative software and make system changes – which Defender might otherwise block. Be aware that on restarting your computer, Defender will again be automatically enabled.
How to Permanently Disable Windows Defender
1. Go to Start.
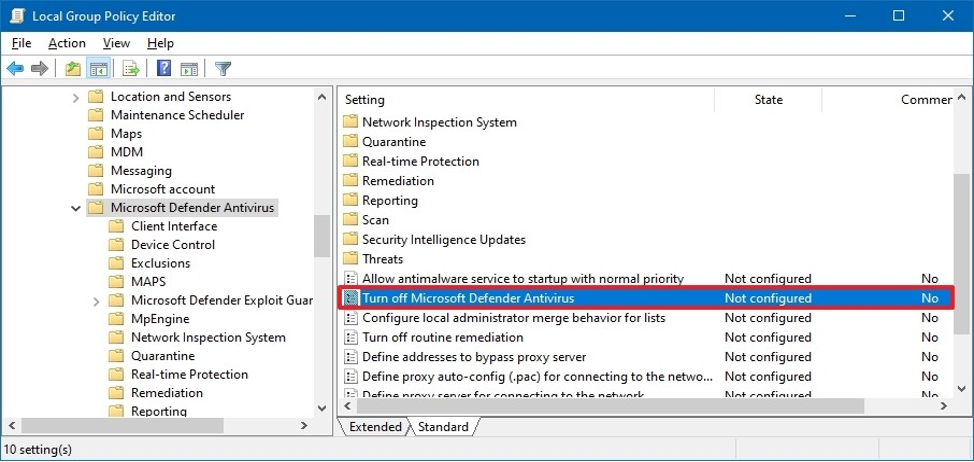
2. In the search bar type gpedit.msc and click the top result. This will open Local Group Policy Editor.
3. Make your way through the following path: Computer Configuration > Administrative Templates > Windows Components > Microsoft Defender Antivirus.
4. Double-click Turn off Microsoft Defender Antivirus.
5. Select Enabled to permanently disable Microsoft Defender Antivirus on Windows 10.
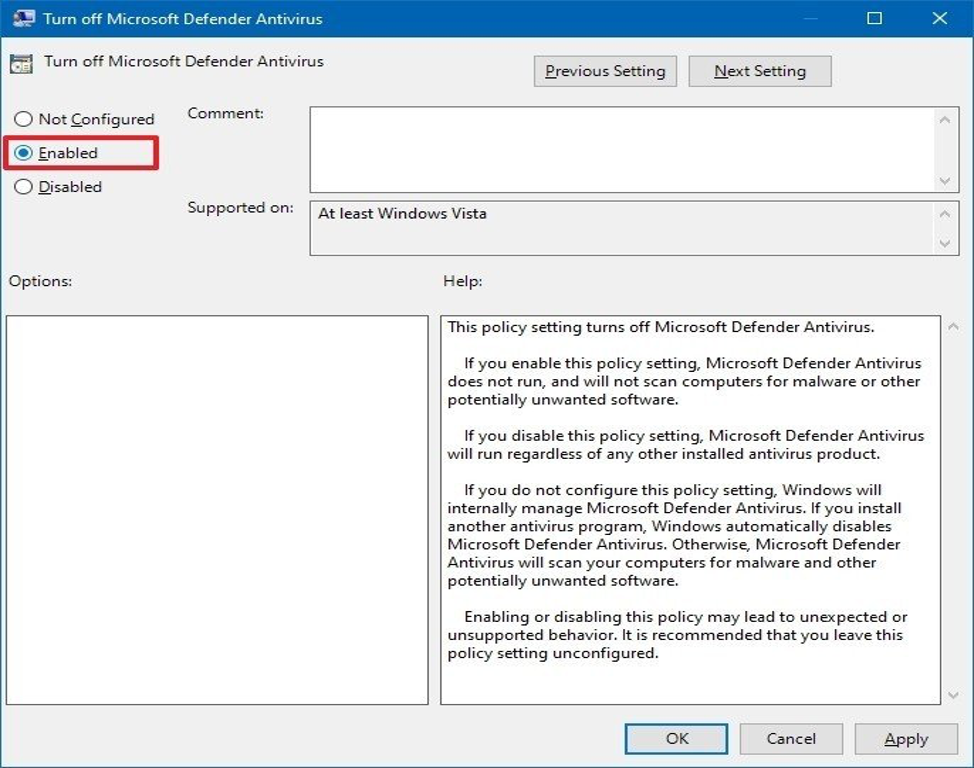
6. Click Apply, followed by OK.
7. Restart your computer.
Following these steps will permanently disable Windows Defender in Windows 10. You will still see the shield icon as it is inbuilt – but it will be an icon only. And don’t worry: if you have second thoughts and want to enable, simply follow the above steps but click Not Configured at step 5.
If this article’s been of use to you, please do share with friends and family!
